
Arduino Nano Type-C
A small, complete, and breadboard-friendly board based on the ATmega328P, updated with a USB Type-C connector.
Component Preview
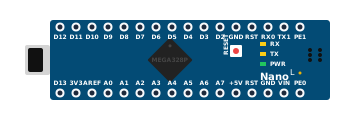 Nano 328P
The Arduino Nano Type-C is a modern spin on the classic Arduino Nano. It retains the same reliable ATmega328P microcontroller, identical pinout, and breadboard compatibility, but upgrades the antiquated Mini-B USB port to a robust, reversible USB Type-C connector.
Overview
Just like the Arduino Uno, the Nano features 14 digital input/output pins (of which 6 can be used as PWM outputs) and 8 analog inputs (A0-A7). It operates at 5V with a 16 MHz clock. Because it lacks a DC power jack, it is powered either via the USB Type-C connection or by supplying 7-12V to the VIN pin.
Pin Reference
| Pin | Type | Description |
|---|---|---|
| D0-D13 | digital | Digital I/O pins. Pins 3, 5, 6, 9, 10, 11 support PWM output. |
| A0-A7 | analog | Analog input pins. A0-A5 can also act as digital I/O. |
| +5V | power | Regulated 5V output (or input if not powered via USB/VIN). |
| 3V3 | power | Regulated 3.3V output (provided by the USB-to-serial chip). |
| VIN | power | Input voltage (7V - 12V) when using an external power source. |
| GND | power | Ground pins. |
| RST | digital | Reset pin. Bring this line LOW to reset the microcontroller. |
Configurable Attributes
(Currently, microcontroller boards in the simulator do not have configurable graphical attributes. You upload code to them directly via the editor.)
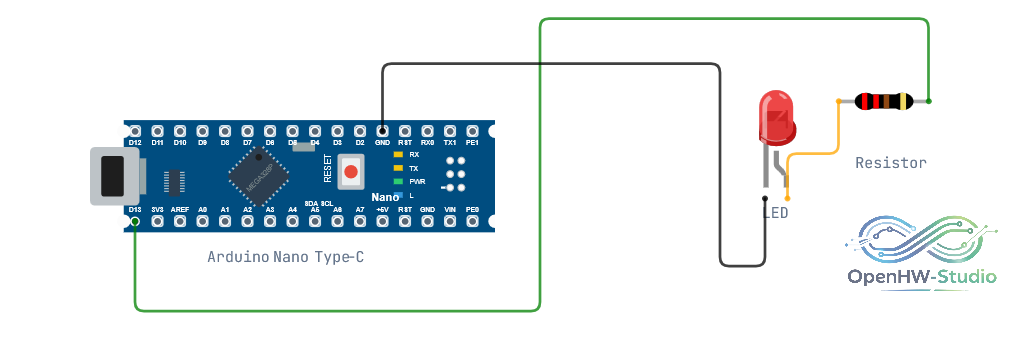
Wiring Diagram (Blink Example)
A classic setup to blink an external LED using the Nano.
- Connect a 220-ohm resistor to D13.
- Connect the other end of the resistor to the Anode (longer leg) of an LED.
- Connect the Cathode of the LED to GND.
Example Arduino Code
Since the Nano is essentially an Uno in a smaller form factor, standard sketches work without modification.
// The built-in LED on the Nano is connected to pin 13
const int ledPin = 13;

void setup() {
  pinMode(ledPin, OUTPUT);
}

void loop() {
  digitalWrite(ledPin, HIGH);   // Turn the LED on
  delay(1000);                  // Wait for a second
  digitalWrite(ledPin, LOW);    // Turn the LED off
  delay(1000);                  // Wait for a second
}
Simulation Notes
- In OpenHW Studio, the Arduino Nano acts as the "brain" of your project.
- The built-in LED (marked
Lon the board) is linked to pin 13 and will visually toggle when that pin is driven HIGH or LOW. - Make sure you select "Arduino Nano" in the board dropdown menu of the editor before compiling your code.