
MicroSD Card Module
A module for reading and writing data to a standard MicroSD card via SPI.
Component Preview
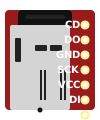 MicroSD SPI
The MicroSD Card Module allows your microcontroller to easily read from and write to MicroSD memory cards. It uses the SPI protocol for communication and is ideal for data logging applications, reading configuration files, or serving web pages over a network.
Overview
Because it communicates over SPI, the SD Card module requires 4 data lines (MISO, MOSI, SCK, CS) plus power and ground. The module often includes an onboard voltage regulator and level shifter, meaning it can safely interface with a 5V Arduino Uno even though SD cards operate at 3.3V.
Pin Reference
| Pin | Type | Description |
|---|---|---|
| CD | digital | Card Detect. (Optional) Goes LOW when a card is inserted. |
| DO | digital | SPI MISO (Master In Slave Out). Connect to Arduino D12. |
| GND | power | Ground. Connect to Arduino GND. |
| SCK | digital | SPI Clock. Connect to Arduino D13. |
| VCC | power | Power input. Connect to Arduino 5V. |
| DI | digital | SPI MOSI (Master Out Slave In). Connect to Arduino D11. |
| CS | digital | SPI Chip Select. Connect to Arduino D10 (or any digital pin). |
Configurable Attributes
(No configurable attributes are currently exposed for this component in the simulator. It behaves as an inserted, formatted FAT32 drive.)
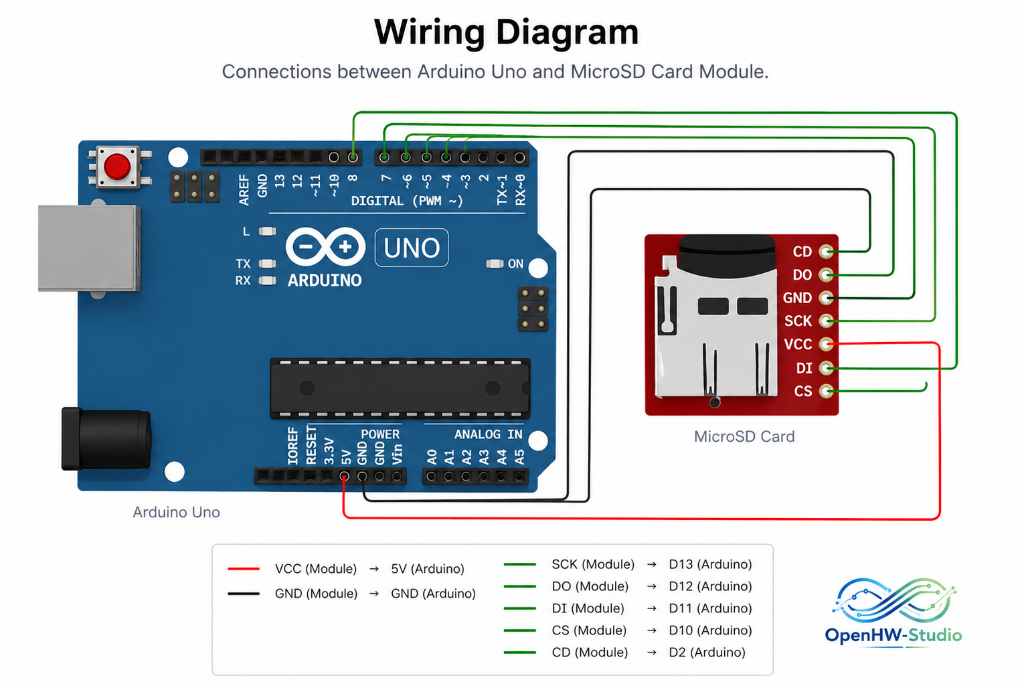
Wiring Diagram (Arduino Uno)
The SPI pins on the Arduino Uno are hardwired to specific pins (11, 12, 13). The CS (Chip Select) pin can technically be any digital pin, but standard libraries use pin 10 or 4 by default.
- Connect VCC to Arduino 5V.
- Connect GND to Arduino GND.
- Connect DI (MOSI) to Arduino D11.
- Connect DO (MISO) to Arduino D12.
- Connect SCK (Clock) to Arduino D13.
- Connect CS (Chip Select) to Arduino D10.
- Connect CD (Card Detect) to Arduino D2 (Optional, for interrupt-based detection).
Example Arduino Code
This sketch uses the built-in Arduino SD library to initialize the card and create a simple test.txt file.
#include <SPI.h>
#include <SD.h>

const int chipSelect = 10;

void setup() {
  Serial.begin(9600);
  while (!Serial) { ; } // wait for serial port to connect

  Serial.print("Initializing SD card...");

  // Initialize the SD card
  if (!SD.begin(chipSelect)) {
    Serial.println("initialization failed!");
    return;
  }
  Serial.println("initialization done.");

  // Open the file. Note that only one file can be open at a time
  File dataFile = SD.open("test.txt", FILE_WRITE);

  // If the file is available, write to it:
  if (dataFile) {
    dataFile.println("Hello from OpenHW Studio!");
    dataFile.close();
    Serial.println("Successfully wrote to test.txt");
  } else {
    // If the file isn't open, pop up an error:
    Serial.println("error opening test.txt");
  }
}

void loop() {
  // Nothing to do here
}
Simulation Notes
- In OpenHW Studio, the SD card is simulated as a virtual filesystem.
- You can write and read files from the simulated card using the standard Arduino SD library, just like physical hardware.
- The virtual SD card resets its contents when the simulation restarts, unless persistent storage is enabled in your project settings.