
IR Receiver
A module that demodulates 38 kHz infrared signals and outputs a clean active-LOW digital signal.
Component Preview
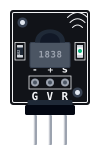 IR Sensor
This receiver decodes signals from standard TV remotes and other IR sources. In OpenHW Studio, you can click the component on the canvas during simulation to open a virtual remote control and press buttons to send IR signals.
Overview
The sensor filters out ambient light and specifically listens for IR light flashing at 38 kHz. It outputs a digital high/low signal that the Arduino can decode using a library (like IRremote) to determine which button was pressed.
Pin Reference
| Pin | Type | Description |
|---|---|---|
| GND (G) | power | Ground. Connect to Arduino GND. |
| VCC (V) | power | Power supply. Connect to Arduino 5V or 3.3V. |
| OUT (R) | digital | Digital signal output. Active LOW (idle state is HIGH). |
WARNING
Active LOW: The OUT pin is Active LOW. The idle state is HIGH. Do not connect OUT to an analog pin — it must be a digital pin (D2–D13 recommended).
Configurable Attributes
| Attribute | Type | Default | Description |
|---|---|---|---|
| frequency | number | 38 | Carrier frequency in kHz. Options: 36, 38, 40, 56. Standard is 38 kHz. |
Working Principle
When an IR remote button is pressed, it flashes an infrared LED at 38,000 times per second in a specific pattern. The receiver sees this flashing and pulls the OUT pin LOW whenever the 38 kHz burst is present.
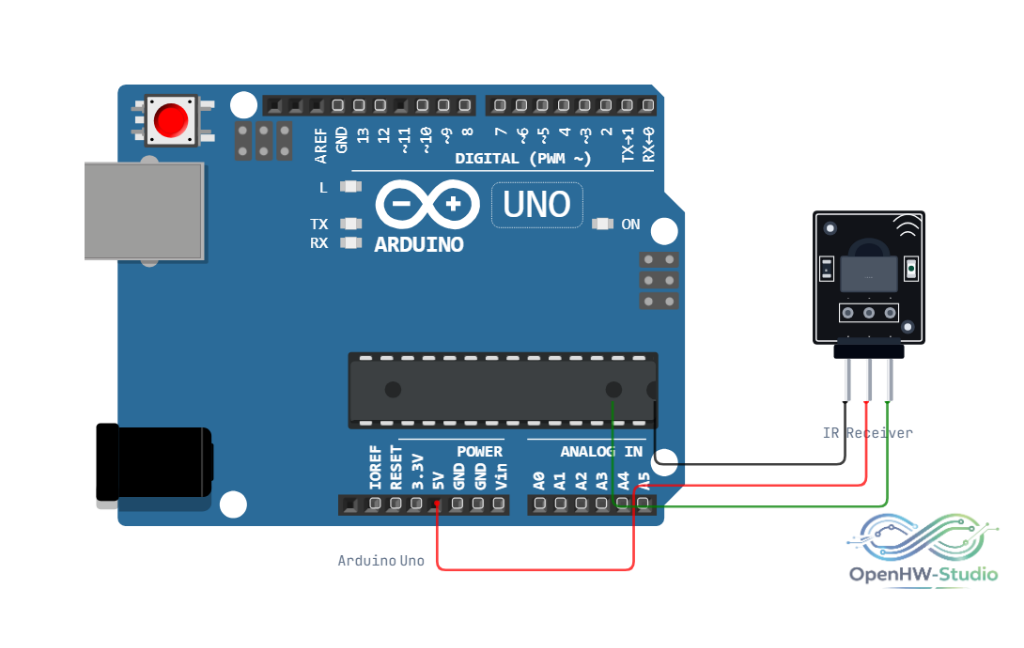
Wiring Diagram
- Connect G (GND) to Ground.
- Connect V (VCC) to 5V.
- Connect R (OUT) to a digital pin (e.g., D11).
Example Arduino Code
Install the IRremote library via the Library Manager before running this sketch.
#include <IRremote.h>

const int IR_PIN = 11;
IRrecv irrecv(IR_PIN);
decode_results results;

void setup() {
  Serial.begin(9600);
  irrecv.enableIRIn();
  Serial.println("IR Receiver Ready — press a button on the virtual remote");
}

void loop() {
  if (irrecv.decode(&results)) {
    Serial.print("Received code: 0x");
    Serial.println(results.value, HEX);

    // Identify button from code (Virtual Remote Uses NEC Protocol)
    switch (results.value) {
      case 0xE0E040BF: Serial.println("POWER");  break;
      case 0xE0E0E01F: Serial.println("VOL+");   break;
      case 0xE0E0D02F: Serial.println("VOL-");   break;
      case 0xE0E016E9: Serial.println("OK");     break;
      default:         Serial.println("Unknown"); break;
    }

    irrecv.resume();
  }
}
Simulation Notes
- Virtual Remote: Click the IR receiver component on the canvas during simulation to open the virtual remote.
- Protocol: The virtual remote uses Samsung-style NEC codes.
Virtual Remote NEC HEX Codes:
- POWER:
0xE0E040BF - VOL+:
0xE0E0E01F - VOL-:
0xE0E0D02F - CH+:
0xE0E048B7 - CH-:
0xE0E008F7 - OK:
0xE0E016E9 - UP:
0xE0E006F9 - DOWN:
0xE0E08679 - LEFT:
0xE0E0A659 - RIGHT:
0xE0E046B9 - 0-9 Numbers: Various (e.g.,
0is0xE0E08877,1is0xE0E020DF).