
Servo Motor
An actuator that uses a feedback loop for precise angular position control, typically across a 180° range.
Component Preview
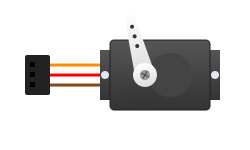 Standard Servo
A hobby servo motor provides precise angular position control. The position is controlled by sending a specific PWM signal to the control wire. Using the Arduino Servo library simplifies this process down to passing an angle (0 to 180).
Overview
The servo motor uses an internal potentiometer and control circuit to form a feedback loop. When you tell it to go to an angle, it turns the motor until the potentiometer reads the correct voltage for that angle.
PWM Timing
The servo expects a pulse every 20ms (50Hz). The length of the pulse determines the position:
- 1.0 ms: 0° (Minimum angle)
- 1.5 ms: 90° (Center position)
- 2.0 ms: 180° (Maximum angle)
Pin Reference
| Pin | Type | Description |
|---|---|---|
| GND | power | Ground (Usually Brown or Black wire). |
| V+ | power | 5V Supply (Usually Red wire). |
| PWM | digital | PWM Control Signal (Usually Orange, Yellow, or White wire). |
Configurable Attributes
| Attribute | Type | Default | Description |
|---|---|---|---|
| angle | number | 0 | Initial angle of the servo motor (0 to 180). |
| horn-color | string | "white" | Color of the servo horn. |
Wiring Diagram (Arduino Uno)
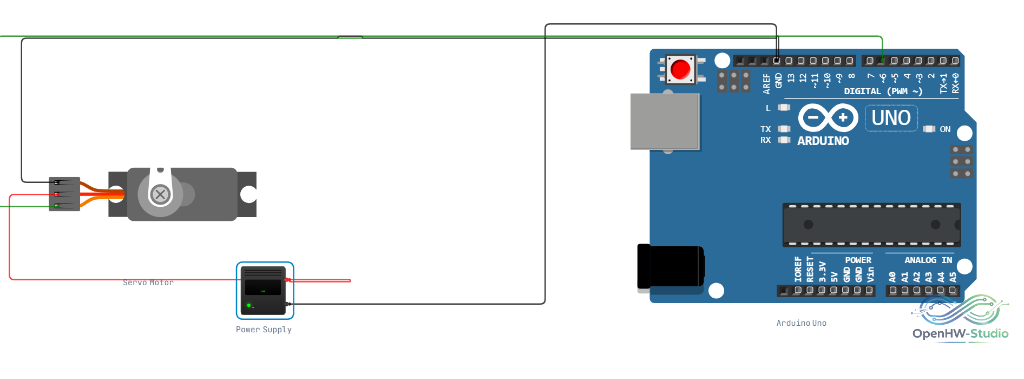
(Note: In real hardware, servos can draw significant current, so a dedicated external 5V power supply is often required if you are using multiple servos or a heavy load).
Example Arduino Code
This example uses the built-in Servo library to sweep the motor back and forth.
#include <Servo.h>

Servo myServo;

void setup() {
  myServo.attach(9); // Attach servo to pin 9
  Serial.begin(9600);
  Serial.println("Servo Motor Ready");
}

void loop() {
  // Sweep from 0 to 180 degrees
  for (int pos = 0; pos <= 180; pos += 1) {
    myServo.write(pos);
    delay(15);
  }

  delay(1000);

  // Sweep from 180 to 0 degrees
  for (int pos = 180; pos >= 0; pos -= 1) {
    myServo.write(pos);
    delay(15);
  }

  delay(1000);
}
Simulation Notes
- Right-click the servo on the canvas during simulation to manually set the angle via the context menu slider. This allows you to verify behavior without waiting for your code to sweep the full range.